Showing posts with label decoration. Show all posts

Tuesday, October 4, 2011

Cupcake Flower Holder.

I found this amazingly simple decorative centerpiece online and I thought of it as a must-share piece.


What you need:
Large zig-zag or similar pot
Floral form (if you can't find a ball shape you can cut it to size)
Candle
Seasonal flowers
Ribbon


The Creation:
Take the floral ball/cut-to-size foam and place it in the zig-zag pot. Insert the candle in the foam (wet the foam for a longer lasting piece) carefully and securely wedge it in. Don't put it all the way down. Now start putting in the seasonal flowers and fill it to the brim (Motia will look absolutely gorgeous and smell wonderful - just saying). Then, tie the ribbon around the candle.


And your piece is ready!


Saturday, October 1, 2011

Paper Wheels Backdrop.


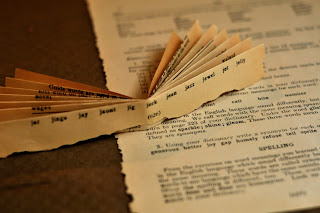
Remember how we made fans with paper when we were kids? Took a sheet of paper and started with the accordion fold, held the finished strip in our hand from one end and spread the the other end.

Well, who new that can turn into a nifty backdrop one day!


Here's how I did it:

Take papers of different colours and sizes. The minimum and maximum depend depends completely on you. My smallest size was 5"x4" and the largest wet to 12"x11". I took wrapping sheets and coloured A4 paper that went with my theme.


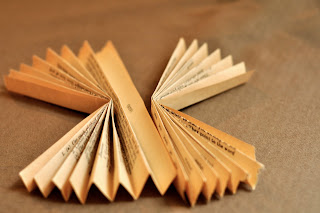
For one paper wheel you will require two folded fans. So, take your paper and fold it into an accordion style.


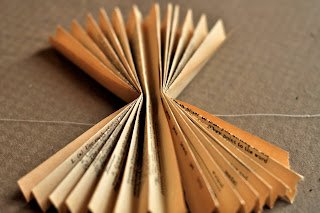
Do the same to the other sheet of paper and put he two back to back.


Take a string and tie the two fans tightly together.


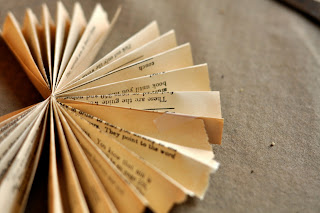
 Next, tape or staple the gaping edges, I stapled them. Go all the the way around until you have a wheel.


Once you have enough pieces to fill the size of your backdrop started making a collage of paper wheels and stick them with hot glue.


 Ta daa!


Thursday, September 15, 2011

Roses of any colour you want.

Lately I have been immersed in a lot of DIY craft, some of which can be done easily while watching Leverage, and others so tedious that they require sweat blood. And in the light of that my negligence toward this blog should be pardoned.

I can't wait to share all that I have made, but that is not what this entry is about.

For now, I'm going to share what I am going to attempt making with the limited paper choices we have in Karachi. For instance, this requires double sided crepe paper, I need to find an alternative because it is not available here to the best of my knowledge. Kite paper, perhaps? But that won't curl or stretch. Hmm. Anyway, I'll keep you guys posted on what material achieved the best result.

Until then, here's how to make crepe paper roses by Katy Elliot:


3267365930 208a43dbea o Crepe Paper Roses
  Tools and MaterialsLarge flower template
Double-sided crepe paper
Smooth-sided pencil
Paper-covered floral wire
Floral tape
White craft glue
Large Flower How-To1. Enlarge and print template. Use the template to trace and cut five teardrop-shaped petals and 15 heart-shaped petals from double-sided crepe paper.
2. To shape petals, cup in center; wrap left and right top edges around a pencil to curl.
3. Make a stem by wrapping three paper-covered wires together with floral tape.
4. Start building flowers by first placing teardrop petals around the stem and securing with floral tape. Place heart petals around the "bud" you have created and secure with more floral tape.
5. Trace and cut the calyx shape from green crepe paper. Wrap calyx around bottom of rose and glue in place.
6. Trace and cut out three leaf shapes from green crepe paper. Draw a bead of glue down the center of each leaf, place a paper-covered wire down, and pinch the crepe paper together over the paper-covered wire "vein" to hide it.
7. Attach the leaves to the stem by wrapping in floral tape.
8. Wrap stem with strips of green crepe paper to cover floral tape; glue in place.